Sonoff NSPanel in Home Assistant: eWeLink, ESPHome and NSPanel Easy
The Sonoff NSPanel EU represents a smart control panel with an integrated touch display at a very reasonable price.
Sonoff NSPanel EU, Gray
 WiFi
WiFi Bluetooth
Specifications
- Display: 3.5" Nextion Discovery NX4832F035, 480x320, capacitive touch
- Buttons: 2x physical buttons below display
- Relays: 2x relay for 240V (officially rated 2 A per channel)
- Sensors: NTC temperature sensor
- Connectivity: Wi-Fi 2.4GHz
- Chip: ESP32-D0WD-V3, 4 MB flash
- Dimensions: 8.6 x 8.6 x 4.2 cm
- Color: Gray / White
eWeLink Application
Out of the box, the device comes with firmware that uses the eWeLink cloud service. Adding the NSPanel is done through the eWeLink mobile app. After pairing, the panel shows a user interface as seen in the image above.


With the stock firmware, you can control relays directly with the bottom buttons, view internal temperature from the panel's sensor, and see outdoor weather information, which updates quite sporadically (seemed like 4 times a day to me).
You can add control of other devices added to eWeLink, but you cannot control devices outside this cloud, which is the biggest drawback for me.
eWeLink Integration
eWeLink can be further integrated with Google Assistant, Alexa, SmartThings, or Philips Hue - the basic foundation of today's systems. Additionally, there's a Home Assistant integration SonoffLAN, which you can install from HACS.

Thanks to this integration, you'll have the ability to control both relays in Home Assistant, read temperature information, and see a few other details.
What you CAN do with eWeLink
- ✅ Control relays directly from the panel
- ✅ Display temperature from internal sensor
- ✅ View basic weather information
- ✅ Add other eWeLink devices
What you CANNOT do
- ❌ Control devices outside eWeLink cloud
- ❌ Deep Home Assistant integration
- ❌ Custom UI or scenes
- ❌ Offline functionality during internet outage
Alternative Firmware
Since the NSPanel contains an ESP32 chip, several alternative firmware options have emerged that expand its capabilities and overcome the limitations of the original eWeLink firmware. Let's look at the most significant ones.
Until now, this article taught you how to install NSPanel_HA_Blueprint. Its main developer has since moved development into his own project, NSPanel Easy, and the original repository now only receives critical fixes. I've therefore rewritten the guide around NSPanel Easy - and below I explain why this isn't a gamble on some unknown fork.
Already running the old project? How to move across without opening the panel is covered in migrating to NSPanel Easy.
Updated 27 July 2026. The installation procedure from 25 July still stands - the hardware, the serial flash and the bootloader mode don't change between the projects. See exactly what changed
NSPanelManager
url: github.com/NSPManager/NSPanelManager
Key Features
- Allows loading entities from Home Assistant and OpenHAB, expanding smart home control possibilities.
- Can function standalone without needing to connect to other systems.
- Great emphasis on easy configuration through web interface, enabling intuitive panel function setup.
- Support for connecting multiple NSPanels together for synchronized control.
Who is it for
- Ideal for users who don't need complex integration with Home Assistant or other smart home systems.
- Suitable for those who prefer simple solutions with basic customization options.
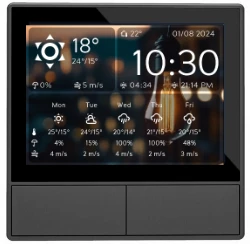
nspanel-lovelace-ui (Tasmota)
url: github.com/joBr99/nspanel-lovelace-ui
Key Features
- Uses Tasmota as base firmware, ensuring stability and flexibility when communicating via MQTT.
- Offers a user interface inspired by Home Assistant's Lovelace UI – allows displaying and controlling a wide range of devices (lights, sensors, thermostats, alarms).
- Configuration is done via YAML files, providing a high degree of customization without needing to modify source code.
- Localization support for over 30 languages ensures availability for users worldwide.
Who is it for
- For advanced Home Assistant users who want to fully customize the appearance and functions of NSPanel.
- Ideal for those with YAML configuration experience looking for a flexible solution.

NSPanel Easy (ESPHome)
url: github.com/edwardtfn/NSPanel-Easy · docs: edwardtfn.github.io/NSPanel-Easy
Key Features
- Built on ESPHome, which is now part of the Home Assistant team – guarantees deep integration and long-term support.
- Offers direct Home Assistant integration without needing external tools or services.
- Simple setup via a Blueprint in Home Assistant – configuration happens directly in the system's user interface.
- The panel's language is set with a single substitution in the ESPHome YAML, and only the strings for that one language get compiled into the firmware.
- The firmware can upload the TFT to the display on its own once it detects a version mismatch at boot.
- Boot memory is actively managed - API actions most people never call are not registered by default.
- A Bluetooth Proxy for BLE sensors is technically possible, but I don't recommend it on this panel - I explain why under Advanced Features.
Who is it for
- For Home Assistant users looking for easy setup and deep NSPanel integration into their system.
- For anyone setting up an NSPanel from scratch today - this is where development continues.
- For those running
Blackymas/NSPanel_HA_Blueprintwho want to stay with the project that still gets new features.

NSPanel_HA_Blueprint - the original project, now in critical-fixes-only mode
url: github.com/Blackymas/NSPanel_HA_Blueprint
This is the project this article was built on for years, and I want to explain the situation properly - because at first glance it looks like "the author is sending me off to some random fork", and that's not what's happening.
NSPanel Easy was written by the very same person who wrote most of NSPanel_HA_Blueprint. In the Blackymas/NSPanel_HA_Blueprint repository, edwardtfn has 3,113 commits, while Blackymas has 494. He was the main developer, not an occasional contributor, and in January 2026 he moved development into his own repository, where he has control over the project's architecture.
He announced it himself in the original repo, in issue #3277 "Transitioning Development to NSPanel Easy" dated 17 April 2026:
I'll continue fixing showstoppers here — things like compilation failures from upstream ESPHome or Home Assistant changes that would completely break the build.
Please read that exactly as written: new features, ordinary bugs and enhancements go to NSPanel Easy, while the original repo only deals with things that would break the build outright. No formal end-of-support date has been announced, the project hasn't "died", and nobody said it ends on some given date. That said, the last commit to the code (as opposed to the README) is from 17 April 2026, and the last released version is v2026041 - exactly the one this article was pinned to until now.
What this means for you:
- Running
NSPanel_HA_Blueprintand it works? No need to rush. You'll still get critical fixes, and your panel won't stop working overnight. - Setting a panel up from scratch today? Go straight to NSPanel Easy so you don't have to do it twice.
- Want new features, or chasing a bug? It gets fixed in NSPanel Easy, not here.
The migration is surprisingly gentle, by the way - it's an OTA update, you don't open the panel, and your automation settings carry over. The whole procedure is in a separate article, From NSPanel_HA_Blueprint to NSPanel Easy.
Which variant to choose?
Each of these firmware options has its advantages. If you're unsure, here's a quick summary:
- NSPanelManager - simple installation, works even without Home Assistant
- nspanel-lovelace-ui - maximum control via YAML, requires advanced knowledge
- NSPanel Easy - best Home Assistant integration, and where the original NSPanel_HA_Blueprint development moved
- NSPanel_HA_Blueprint - the original project NSPanel Easy is derived from; critical fixes only these days
In this article, we'll focus on NSPanel Easy (ESPHome), which I now consider the best solution for most Home Assistant users. It offers easy installation, deep integration, and above all it's where development moved from the original NSPanel_HA_Blueprint - same main developer, same configuration structure.
Until April 2026, the recommendation here was Blackymas/NSPanel_HA_Blueprint. If that's what you're running, your panel keeps working and there's nothing you have to do right now - just be aware that new things now land elsewhere.
Sonoff NSPanel EU, Gray
- WiFi
- Bluetooth
Sonoff NSPanel EU, White
- WiFi
- Bluetooth
CP2102 USB 2.0 to TTL UART Module
 USB
USB
What's Inside - Hardware and GPIO Pinout
Before we get to flashing, it helps to know what's actually inside the panel. The following overview is based on the detailed teardown by blakadder and you'll appreciate it most if you want to write your own ESPHome or Tasmota configuration.
If the hardware doesn't interest you, skip ahead to What You'll Need.
Main Components
- ESP32-D0WD-V3 - dual-core chip with Wi-Fi and Bluetooth, 4 MB flash memory (GigaDevice on my unit, the teardown lists Winbond - it varies by production batch)
- Nextion Discovery NX4832F035 - 3.5" display with 480x320 resolution and capacitive touch (CST340 controller)
- STM32G031G8 - a separate microcontroller that handles the display graphics
- NTC thermistor MF52A - 10 kΩ ±1%, B = 3950 - the panel's temperature sensor
- 2x relay on a separate board
The display has its own processor (STM32G031G8) and keeps the entire graphical interface in its own memory. The ESP32 only talks to it over a serial line, sending events like "a button was pressed" or "change this text". That's exactly why firmware is uploaded in two stages - once to the ESP32 (ESPHome) and once to the display (the .tft file).
Pinout and GPIO Mapping
| Function | GPIO | Board label |
|---|---|---|
| Button 1 (left) | GPIO14 | K1 |
| Button 2 (right) | GPIO27 | K2 |
| Relay 1 | GPIO22 | RY1 |
| Relay 2 | GPIO19 | RY2 |
| Relay 3 | GPIO23 | RY3 - unpopulated |
| Display - RX on the ESP32 side | GPIO17 | TF_RX |
| Display - TX on the ESP32 side | GPIO16 | TF_TX |
| Display reset | GPIO4 | T_RST |
| Temperature sensor | GPIO38 | NTC |
| Light sensor | GPIO37 | ALS - unpopulated |
| Buzzer | GPIO21 | BZ |
| Serial line (flashing) | GPIO3 / GPIO1 | U0RXD / U0TXD |
The TF_RX and TF_TX labels on the board are from the ESP32's point of view. In ESPHome that translates to tx_pin: 16, rx_pin: 17 and a baud rate of 115200.
If you're using a ready-made solution (NSPanel Easy or a Tasmota template), the project has the pins configured for you and you won't need this table. It's for those of you writing your own YAML configuration from scratch, or debugging why something isn't responding. Also keep in mind that GPIO5, GPIO9 and GPIO18 are occupied by the PSRAM - don't use them for your own peripherals.
ESPHome prints it at boot: [C][psram:020]: Size: 2048 KB, so 2 MB, of which typically only a few percent gets used. The blakadder teardown says "16MB PSRAM" - most likely 16 Mbit, which is exactly 2 MB, so the two figures don't actually disagree.
Watch out for one trap: the compile output says SPI DRAM ... from 4194304 bytes, which is the size of the address window, not the chip. The runtime figure is the authoritative one.
More important than the size is one limitation: Wi-Fi buffers must be DMA-capable and on the ESP32 they cannot live in PSRAM. Free PSRAM therefore won't help you when the panel runs short of internal DRAM. I go through the practical consequences in When the NSPanel won't boot after an update.
ESPHome may print this line at boot:
[W][app:198]: Bootloader supports SRAM1 as IRAM (+40KB). Set sram1_as_iram: true under esp32 > framework > advanced
If it does, one option in Step 2 buys you 40 kB of IRAM:
esp32:
  framework:
    advanced:
      sram1_as_iram: true
It reclaims memory the bootloader had reserved as DRAM and hands it to the application as IRAM instead. It costs you nothing in free heap or DRAM, because that memory was never part of the heap in the first place. On top of that it widens the flash cache window for XIP, so there are fewer cache misses and all code running from flash - Wi-Fi, BLE and the API server included - performs better. It also helps against "IRAM overflow" compile errors (section '.iram0.text' will not fit in region 'iram0_0_seg'). Whether you need that second part at all is something to check in the summary at the end of the build - look for the IRAM line in it. My panel reports IRAM 84,263 B (48.98%), 87,769 B left out of 172,032 B, so it still has half the room to the ceiling, which leaves it only the wider flash cache window out of the whole benefit. This is valid only on the original ESP32 and only with the ESP-IDF framework - the NSPanel, with its ESP32-D0WD-V3 and esp-idf, meets both, and the default is false.
One thing must not get lost, though: this is IRAM, not DRAM. It does nothing for the internal-DRAM squeeze described just above and dissected in the post-mortem.
And the risk here is every bit as large as the benefit. The option requires a bootloader from ESP-IDF v5.1 or newer, and OTA updates do not touch the bootloader - only flashing over USB or the serial line rewrites it. With an older bootloader the device will not boot at all, and only a serial reflash brings it back. On a panel sealed into a wall that means taking it down and opening it up.
So stick to the rule that verifies itself: enable it only when that [W][app:198] line is actually in your own log. ESPHome prints it precisely when it detects a compatible bootloader on your device. If you don't see it there, leave sram1_as_iram alone.
The relays on the board are physically rated for 10 A, yet Sonoff officially specifies the panel for 2 A per channel and 4 A in total. For LED lighting the limit is stricter still - 300 W per channel and 600 W in total (at 230 V). The reason most likely lies in the PCB design and heat dissipation inside a closed wall box. Stick to 2 A (roughly 460 W of resistive load at 230 V) and use a contactor or a separate relay for heavier appliances.
What's Missing in the NSPanel and Why Humidity Doesn't Work
When designing the panel, Sonoff clearly planned for more features than ended up in mass production:
- The humidity reading is fabricated. The panel reports humidity in eWeLink, but there is no sensor in it at all - position H2 on the board was left empty and the firmware simply reports a hard-coded 50%. If that value struck you as suspiciously stable, now you know why.
- The buzzer (BZ, GPIO21), on the other hand, is populated. Blakadder's teardown lists it as missing, but on regularly sold units you'll find it next to the
B1silkscreen (it's visible on the board photo further down). The Tasmota template accounts for it too, and in ESPHome you can drive it through thertttlcomponent - the panel can then beep on a button press or play a simple melody as a notification. - The third relay (RY3, GPIO23) is missing. The relay board has a prepared position for a third unit driven from GPIO23. It's most likely a leftover from an earlier revision of the design.
- The ambient light sensor (ALS, GPIO37) only exists on paper. The pin carries that label on the board, but no light-sensitive component is fitted and neither the stock firmware, nor Tasmota, nor any of the ESPHome projects work with it. To dim the display according to ambient light, you'll need a different sensor in Home Assistant or the sun's position instead. A real light sensor only arrived with the higher-end NSPanel Pro, where Sonoff advertises it as one of the new features.
Adding the third relay means working inside a device connected to 230 V mains and, of course, voiding your warranty. If you're not one hundred percent sure what you're doing, leave it alone. And if you do go for it, keep the panel disconnected from mains the entire time.
What You'll Need
Before we begin the installation, prepare the following:
Hardware
- Sonoff NSPanel (obviously 😊)
- USB-TTL adapter with CP2102 or CH340 chip (see below)
- Jumper wires Female-to-Female type (minimum 5)
- Nothing else - power comes straight from the adapter, no external supply needed
Software
- Installed Home Assistant with the ESPHome app
- Computer with Chrome or Edge - why only these two
Sonoff NSPanel EU, Gray
- WiFi
- Bluetooth
CP2102 USB 2.0 to TTL UART Module
- USB
Dupont cables 10cm / 20cm / 30cm - male / female
If you don't have ESPHome installed yet, check out my article about ESPHome. The general mechanics of serial flashing - adapter drivers, esptool, picking a baud rate and rescuing a device that won't boot - are in a separate article, Flashing ESPHome Firmware over USB. Here I stick to what's specific to the NSPanel.
Before any manipulation with the panel, disconnect 230V power! We're working with 3.3V logic, but safety first.
Preparing NSPanel for Flashing
Before we upload the new firmware, we need to open the NSPanel and connect a USB-TTL adapter. Don't worry, it's not as complicated as it sounds.
Opening the Panel
- Unclip the panel from the mounting base
- Unscrew 2 screws at the bottom of the plastic cover
- Lift the plastic cover
- You'll find two headers, and you'll need both:
- the 5-pin serial header labeled 3V3, RX, TX, GND, IO0 - this carries the data
- the power header with a
5Vpin, which the panel's power supply feeds during normal operation - this is how you power the panel while flashing
For the data transfer itself, 3 pins are sufficient (RX, TX, GND). You'll need the IO0 pin (GPIO0) to switch the chip into boot mode - connect it to GND and only then apply power (see the step below). NSPanel Manager's documentation confirms this too.
Don't power the panel from the serial header. Its 3V3 pin is enough for the flash itself, but the panel won't boot afterwards and will keep restarting - why that happens and exactly what you'll see in the log is covered in the article on flashing over USB. Use the 5V pin on the power header and feed the adapter's +5V into it. You don't need an external supply for any of this.
And never put +5V on the serial header's 3V3 pin. Five volts on a 3.3 V pin will destroy the chip for good.
Connecting to USB-TTL Adapter
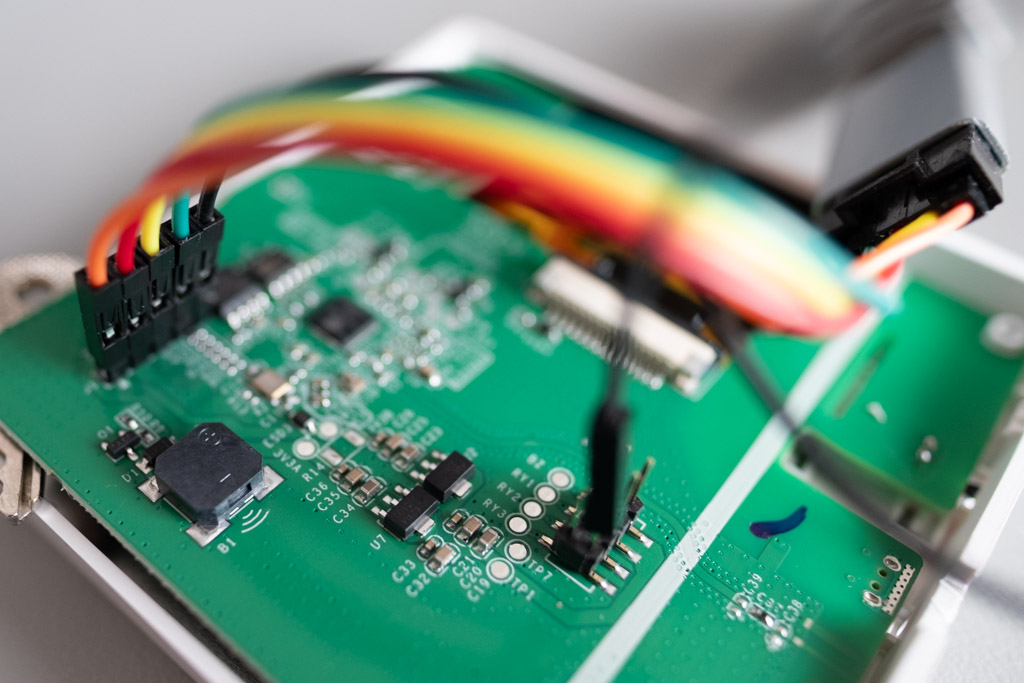
Connect the cables as follows:
| NSPanel | USB-TTL Adapter |
|---|---|
| TX (serial header) | RX |
| RX (serial header) | TX |
| GND (serial header) | GND |
| IO0 (serial header) | to GND, boot mode only |
| 5V (power header) | +5V |
Data goes over the serial header, power over the power header. Leave the 3V3 pin on the serial header unconnected - here's why.
TX from the panel goes to RX on the adapter and vice versa!
The display's metal shield sits right next to the serial header and the pins can easily short against it. If you solder a permanent header into the panel, cover its underside with electrical tape. With temporarily held DuPont connectors, at least make sure they don't touch the shield.
Entering Bootloader Mode
An ESP32 enters firmware download mode when GPIO0 is pulled to ground as power is applied (why that pin). On the NSPanel board it's broken out as IO0, right there on the five-pin header. The automatic reset that puts development boards into boot mode on their own isn't available here - on the panel you have to do it by hand.
- Disconnect the NSPanel from power (both 230 V and the USB-TTL adapter)
- Connect
IO0toGND- with a wire, a jumper, or simply hold it there - Apply power (plug the USB-TTL adapter into your computer)
- You can then remove the short
The panel is now in bootloader mode and ready for firmware upload. You'll know it worked when esptool or the web flashing tool connects to it.
Many guides (and earlier versions of this article) claim it's enough to hold the left button below the display while powering up. Don't believe it. The NSPanel's buttons are on GPIO14 and GPIO27, so they have nothing to do with GPIO0 and won't put the chip into boot mode. I wasted plenty of time on this before reaching for IO0.
Corrected 25 July 2026, see the change log. NSPanel Manager's documentation confirms it too.
Installing ESPHome Firmware
Verified on 27 July 2026 with ESPHome 2026.7.2 (ESP-IDF v5.5.5) and NSPanel Easy v2026.7.1.
Let me be honest about one thing: I have this combination verified from a migration off Blackymas/NSPanel_HA_Blueprint, not from a clean from-scratch install on an untouched panel. The serial flash, the bootloader mode and the whole hardware part of the procedure don't change between the two projects, though - that part is verified from the original installation on 25 July 2026. What changes is the contents of the YAML configuration and the names of a few controls in Home Assistant.
NSPanel Easy polices its own minimum ESPHome version: it's declared in the firmware and checked at compile time, so too-old ESPHome gives you a clear error rather than something cryptic. For v2026.7.1 that minimum is 2026.5.0. The project's general rule is that it targets Home Assistant and ESPHome versions released no more than two months before the given NSPanel Easy release.
The project recommends 4 GB of RAM for ESPHome running as a Home Assistant add-on - on a Raspberry Pi that means a Pi 4 with 4 GB as the minimum. A manual ESPHome installation on a computer gets by with 2 GB plus 500 MB of swap. With less, the compiler crashes. If your compile dies for no apparent reason, look here rather than in your configuration.
The order of steps matters here. Prepare the configuration first, flash second - otherwise you'd end up flashing the panel twice.
It's four steps plus reassembly:
- Create the device in ESPHome (don't install firmware yet)
- Paste the YAML configuration with the NSPanel Easy package
- Compile and download the
.factory.bin - Flash over the serial line
- Reassemble, connect to 230 V and add to Home Assistant
Step 1: Create the device in ESPHome
- In Home Assistant, open the ESPHome Device Builder add-on
- Click + New Device → Continue
- Name the device, for example
nspanel01 - Pick ESP32 and click Skip - we're not installing firmware yet
- Click the newly created device and choose Edit
Step 2: YAML configuration with the NSPanel Easy package
Delete the entire contents of the editor and paste this. This is the part most guides (including earlier versions of this one) leave out - and without it the panel will have no display controls and none of the Blueprint's entities:
api:
  encryption:
    key: !secret api_encryption_key

substitutions:
  device_name: "nspanel01"
  friendly_name: "NS Panel"
  wifi_ssid: !secret wifi_ssid
  wifi_password: !secret wifi_password
  ota_password: !secret ota_password
  language: en             # language code - full list in the project docs
  boot_sound: false
  upload_tft_automatically: true

# Safe mode counter in RTC memory - a power cycle wipes it
safe_mode:
  storage: rtc

packages:
  remote_package:
    url: https://github.com/edwardtfn/NSPanel-Easy
    ref: v2026.7.1         # pinned tag, not 'latest'
    refresh: never
    files:
      - nspanel_esphome.yaml
The language: substitution is new in NSPanel Easy - with NSPanel_HA_Blueprint you picked the language in the Blueprint. Only the strings for that one language get compiled into the firmware, which saves memory and lets the panel show correct text even while offline. Leave the substitution out and the panel falls back to English. The full list of codes is in the Localization docs.
After changing the language you have to recompile and flash - saving the file isn't enough.
This is the minimal working configuration. The project offers add-on modules on top of it, added as further entries under files:. Careful: the add-ons live in the esphome/ subfolder, while the base nspanel_esphome.yaml stays at the root - that's the single most common source of errors when coming from the older project.
    files:
      - nspanel_esphome.yaml   # base package - NO esphome/ prefix
      # Display as a light in HA (dimmable from automations)
      - esphome/nspanel_esphome_addon_display_light.yaml
      # Thermostat driving heating through a relay
      # - esphome/nspanel_esphome_addon_climate_heat.yaml
      # - esphome/nspanel_esphome_addon_climate_cool.yaml
      # - esphome/nspanel_esphome_addon_climate_dual.yaml
      # - esphome/nspanel_esphome_addon_cover.yaml
I use the first one myself. The climate add-ons additionally want the heater_relay: "1" and cooler_relay: "2" substitutions (which relay heats and which cools). The full list is in the project's documentation - but every add-on grows the firmware, so check your memory usage at compile time after adding one.
The !secret values must exist in your secrets.yaml (Secrets in the bottom left of ESPHome). Generate api_encryption_key from the ESPHome docs or any 32-byte base64 key generator.
The api: encryption: block and safe_mode: storage: rtc are my own additions - you won't find them in the official template. The first encrypts communication with Home Assistant, the second saves you a serial cable should the panel ever latch into safe mode - I explain that further down under The NSPanel is black, not on Wi-Fi, and reflashing doesn't help. I'd keep both.
Conversely, ota_password in NSPanel Easy is separate and optional. With NSPanel_HA_Blueprint it was derived from the Wi-Fi password, so if you're migrating a panel wirelessly you need ota_password: ${wifi_password} there for that first OTA. On a clean install over serial you can pick whatever you like.
ref: latestHere I deliberately depart from the official NSPanel Easy documentation, which recommends ref: latest with refresh: 300s. Let me explain why.
latest is a moving tag - it always points at the newest release. Together with refresh: 300s that means the package is re-fetched on every recompile, and if a new version has landed in the meantime, you get it without asking. That's exactly the pattern that once put my panel out of action for 42 hours (back then in the ref: main variant). The gap between "a new version exists" and "a new version is on my panel" should be your decision, not a matter of when you happened to click Install.
With ref: v2026.7.1 and refresh: never you update deliberately: you look at what's new and change one number. Current releases are on the releases page - the project ships frequently, and roughly monthly over the past few months. Since the new repository it uses the v2026.7.1 scheme (it used to be v2026041).
One more note on that scheme, because it's easy to misread: the last number isn't a patch level, it's the release's sequence within the month. So v2026.5.15 is the fifteenth May release, not "patch 15" of some 2026.5 version. That also shows just how often the project shipped early on - April 2026 saw 28 releases, June only two.
One exception: if you're migrating a panel off Blackymas/NSPanel_HA_Blueprint, the project's migration guide wants ref: latest for that first install during the migration. A specific tag can be used afterwards. On a clean from-scratch install you don't have this problem and can pin the version right away.
If your SSID is hidden, add this as well, or the panel will take a long time to connect - or never will:
wifi:
  fast_connect: true
Step 3: Compile and download the factory.bin
- Click Save, then Install
- Choose Download firmware binary (under
Advanced options) - Let it compile - the first time takes up to ten minutes
- When prompted, download the
.factory.bin(not the plain.bin, which is for OTA and won't boot from a serial flash)
The compile prints memory usage at the end. If you're above 90% Flash or have less than ~50 kB of free DRAM, you're on the edge and the next update may tip you over. The most common culprit is bluetooth_proxy - I explain why I don't recommend it on the panel further down.
Step 4: Flash over the serial line
From here the procedure is the same as for any other ESP32, so I'll send you to Flashing ESPHome Firmware over USB - it covers all three methods (the Device Builder's web flasher, web.esphome.io, esptool), adapter drivers and troubleshooting.
Before you go, three things that are easy to get wrong on the NSPanel:
- ✅ The panel must be in bootloader mode -
IO0toGNDbefore power is applied - ✅ Power from the adapter's
+5Vpin into the panel's5Vpower-header pin. Don't power the panel from the serial header - a flash from its3V3will succeed, but the panel won't boot afterwards - ✅ Flash the
.factory.binfrom Step 3, not the plain.bin
The upload itself takes about a minute.
Step 5: First boot
- Disconnect the USB-TTL adapter, every wire
- Reassemble the NSPanel
- Connect it to 230 V
- The panel boots and joins Wi-Fi
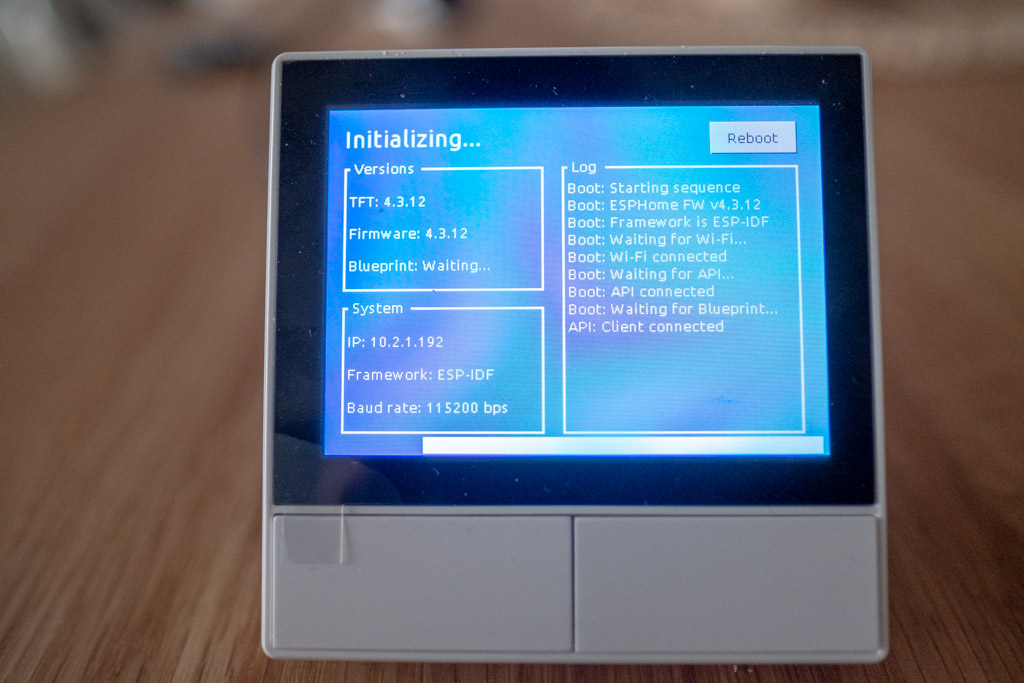
The panel on 230 V while the USB-TTL adapter is plugged into your computer is the combination that costs you the adapter, the USB port, or more. One at a time, always.
Integrating into Home Assistant
Automatic Detection
Home Assistant should find the NSPanel by itself after the first boot:
- Open Settings → Devices & Services
nspanel01should appear under Discovered- Click Configure
- Paste the
api_encryption_keyfrom yoursecrets.yaml - Confirm
Manual Addition
If automatic detection doesn't work:
- Settings → Devices & Services → Add Integration
- Search for ESPHome
- Enter the panel's IP address and port
6053
Quickest in your router's DHCP table. Alternatively in the panel's ESPHome log - the [C][wifi:1259]: IP Address: line.
The Blueprint entities are missing in Home Assistant
Check this, because every step that follows depends on it. The device page must show the diagnostic entities Version - ESPHome, Version - Blueprint and Version - TFT, plus the Display model and Update TFT display controls under Configuration.
If they're missing, the panel isn't running the NSPanel Easy configuration - most often because the generic "prepare for first use" firmware got flashed instead of the one from step 3. You can confirm it in the log, which must name the project:
[I][app:153]: Project edwardtfn.NSPanel-Easy version "2026.7.1"
With NSPanel_HA_Blueprint the model selector was called Update TFT display - Model; in NSPanel Easy it's simply Display model. If you're following an older guide and looking for the old name, you won't find it - and nothing is actually wrong.
Uploading TFT Firmware for the Display
The NSPanel display (Nextion) has its own firmware that needs to be uploaded separately. In NSPanel Easy this process is significantly simpler - and on a first install you mostly don't have to deal with it at all.
Automatic Upload (Recommended)
With the upload_tft_automatically: true substitution from Step 2, the firmware uploads the TFT by itself: after boot it compares the TFT version in the display against what it expects, and starts the transfer when they don't match. All you need to do is select the right model and wait.
- Open your NSPanel's page in Home Assistant (Settings → Devices & Services → ESPHome)
- In the Configuration section, you'll find two controls:
- "Display model" - expand and select your model. Note there are five options in that dropdown, not three:
- NSpanel EU - for European model (the default)
- NSpanel US - for American model (portrait)
- NSpanel US Landscape - for American model in landscape orientation
- NSpanel Blank - a minimal TFT showing a QR code, not meant for normal use; it's there to clear the display before uploading the real file (see troubleshooting)
- NSpanel Easy EU (Under construction) - the new design still under development; don't pick it for normal use
- "Update TFT display" - press this if you don't want to wait for the automatic upload
- "Display model" - expand and select your model. Note there are five options in that dropdown, not three:
- ESPHome will automatically download the correct TFT file from GitHub and start uploading to the display
- A progress bar with a black background will appear on the display
- Transfer takes 10-20 minutes
The Display model selector does two jobs at once, by the way - besides picking the file, it also configures the panel's runtime behaviour (touch calibration, button layout, display orientation). So always keep it set to whatever you physically have on the wall.
This is an easy trap to fall into precisely because you're installing NSPanel Easy: the dropdown holds an option literally named NSpanel Easy EU, and reaching for it feels like the obvious move. But it's a new display design still under development, not "the TFT for NSPanel Easy" - hence the "(Under construction)". It would upload nspanel_easy_landscape.tft, which is 3.3 MB against the 13 MB of a finished file, and the panel wouldn't be usable.
For a European panel, pick NSpanel EU even though you're installing NSPanel Easy.
With NSPanel_HA_Blueprint there were separate TFT files marked (CJK languages) for Chinese, Japanese and Korean. In NSPanel Easy those character sets are built into the standard TFT files and the separate variants have disappeared - just pick the model that matches your hardware, whatever language you use.
ESPHome automatically selects the correct TFT file version based on your chosen model and downloads it directly from the project's repository. You don't need to download anything manually!
On the very first boot it's normal for the log to repeat [W][nextion:xxx]: Not connected for a while - the firmware is probing for the right baud rate on the serial line to the display, and Sonoff's stock firmware uses a different one. This can take a couple of minutes.
After that, ESPHome will automatically retry several times with different parameters. If it still doesn't work — or if the transfer fails even from a local folder — there's a dedicated section walking through the causes.
Manual Upload (Only if Automatic Fails)
If automatic upload repeatedly fails, you can host the TFT yourself. NSPanel Easy offers two substitutions for that, and it matters a lot which one you pick:
nextion_update_base_url- overrides only the server address the files come from. Automatic model and version selection stays in effect, which is usually what you want for local hosting.nextion_update_url- a full override. When set, it bypasses the model selector and the entire version logic, and that one URL is used as-is. Keeping a compatible, up-to-date file behind it is then your responsibility.
The full-override procedure:
-
Download the correct TFT file from the
hmi/folder in the repository at the version tag you have pinned- For EU model:
nspanel_landscape.tft - For US model (portrait):
nspanel_portrait.tft
- For EU model:
-
Upload the file to a local HTTP server (e.g., to
/config/www/folder in Home Assistant) -
In your ESPHome configuration, add it to the
substitutions:block (not at the root - it's a substitution):substitutions:# ... the other values from Step 2nextion_update_url: "http://homeassistant.local:8123/local/nspanel_landscape.tft"Adjust the address for your own instance - new Home Assistant OS installations run on port 80, so without
:8123. -
Compile, flash over OTA and press the "Update TFT display" button
nextion_update_url" option in the selector any moreWith NSPanel_HA_Blueprint you activated nextion_update_url by picking a dedicated "Use nextion_update_url" option in the model selector. That option doesn't exist in NSPanel Easy - the substitution takes effect automatically as soon as it's non-empty. So leave the Display model selector on your actual model, because touch calibration and button layout are still driven by it.
And if you only used nextion_update_url to pick the model (which the old project allowed), remove it - the selector handles the model on its own now.
Configuration Using Blueprint
Now comes the best part - setting up what will be displayed on the panel!
Installing the Blueprint
In NSPanel Easy the Blueprint is called nspanel_easy_blueprint.yaml (it was nspanel_blueprint.yaml in the old project) and is imported from a different address.
- Open this link: NSPanel Easy Blueprint
- Or use the button:

latest is fine here after I warned you off it in Step 2Did you spot it? That address contains refs/tags/latest - the very same moving tag I avoided for the ESPHome configuration. This isn't inconsistency; there's a real difference.
With the firmware, the problem is that the package is re-fetched on every recompile - so you get a new version as a side effect of clicking Install for some entirely unrelated reason. A Blueprint, by contrast, never updates itself. Re-importing it in Home Assistant is something you have to ask for explicitly, so it's always a deliberate step and a moving tag breaks nothing. It also matches how the project sets source_url inside the Blueprint itself.
A version mismatch won't stay hidden either: the firmware carries a min_blueprint_version (2026.5.15 in v2026.7.1) and checks the Blueprint version reported by Home Assistant at boot. If the Blueprint is too old, you'll hear about it - and you can see the state in the Version - Blueprint entity.
The most noticeable change against NSPanel_HA_Blueprint: there's no language option in the Blueprint. It's set with the language: substitution in the ESPHome YAML, see Step 2. The Localization section in the Blueprint is still there, but it now only deals with date, time and unit formats (temperature unit, decimal separator and compact unit display).
If your panel speaks English after the migration, this is why - and it isn't fixed in the Blueprint, but by recompiling the firmware.
Creating an Automation
- Go to Settings → Automations & Scenes → Blueprints
- Find NSPanel Easy Configuration and click it
- Fill in:
- NSPanel device (REQUIRED): pick your panel's ESPHome device
- Weather and temperature: the weather and temperature entities (the panel's internal sensor or an external one)
- Save it and give the automation a name so you can tell your panels apart later
Never assign the same panel to two automations. Home Assistant does nothing to stop you, but the panel then behaves unpredictably and it puts needless load on your Wi-Fi and on Home Assistant itself. With multiple panels, create a separate automation for each.
Adding Pages and Controls
The rest of the Blueprint is a long list of collapsed sections that configure the whole panel. The most important ones:
- Home page - Entities states and Home page - Custom buttons - what's visible on the main screen
- Button pages 01-04 - up to four pages of buttons; for each button you pick the entity, name, icon, colour, and optionally a confirmation dialog or a custom action
- Entities pages 01-04 - up to four pages listing entities
- Chips - small status icons in the top bar
- Climate page, Water heater page, Utilities page, QR code
- Hardware buttons - what the two physical buttons below the display should do
- Screensaver, Media player, Notifications, Localization (date, time and unit formats), Advanced settings
It's all point-and-click in the user interface; you don't have to write any YAML.
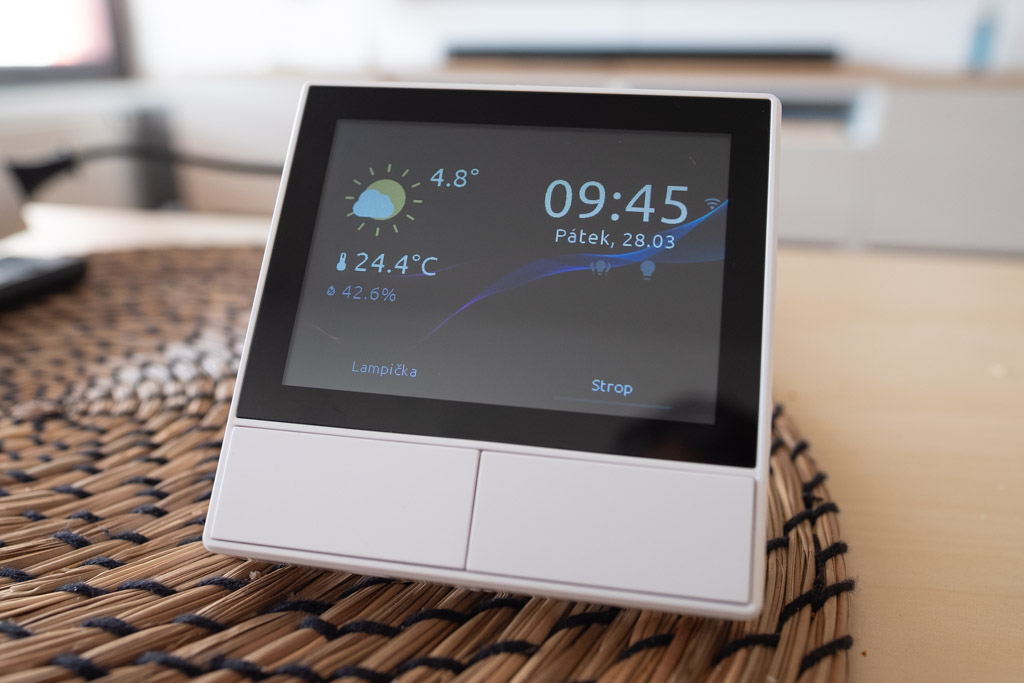
The Blueprint automatically detects the entity type (light, switch, cover) and displays the appropriate controls.
Advanced Features
Bluetooth Proxy - and why I don't recommend it
Technically the NSPanel can work as a Bluetooth proxy. Add bluetooth_proxy: to your configuration and BLE devices within range of the panel show up in Home Assistant.
This is a feature I changed my mind about after learning the hard way.
I compiled the same configuration twice, the only difference being bluetooth_proxy:. The result:
with bluetooth_proxy | without | |
|---|---|---|
| Flash | 1,529,391 B (83.3%) | 1,110,539 B (60.5%) |
| Total internal DRAM pool | 124,580 B | 180,736 B |
| Free internal DRAM | 55,228 B | 123,352 B |
The middle row is the important one. The BLE controller carves its memory out of the total pool at link time - it isn't merely a matter of consumption. Free internal DRAM drops to less than half, and PSRAM won't save you because Wi-Fi buffers have to be DMA-capable.
My panel ran on those 55 kB for six months. Then one ESPHome update grew the firmware slightly, the headroom vanished, and the panel ended up black and unreachable. I walk through that whole diagnosis in When the NSPanel won't boot after an update.
The project documentation warns about this too, and quite precisely:
During Startup: If your device runs out of memory at startup, it may not load the firmware, resulting in a black screen and an unresponsive device.
The original project also removed the Bluetooth Proxy add-on as a breaking change (issue #2669) and its documentation page now contains a single sentence: "This add-on has been removed." The history of related problems is long - #2168 "Enabled active bluetooth proxy bricks devices", #1815 "TFT Update Fails if Bluetooth Proxy is enabled" and others.
This one pleased me, because it independently confirms what I worked out during my own diagnosis. NSPanel Easy has a whole documentation section called Reducing Registered API Actions, and it contains this sentence:
Each API action registered by ESPHome consumes heap memory at boot. On memory-constrained configurations — such as those running Bluetooth Proxy — this can cause boot instability or crashes.
That's why the upload_tft and wake_up API actions are excluded by default - most people never call them from automations, and registering them eats heap at boot for nothing. You get them back with the include_action_upload_tft: true and include_action_wake_up: true substitutions.
It's the right move and it hands you back a few kilobytes. It doesn't change my recommendation, though, for a simple reason: the BLE controller carves its memory out of the total pool at link time, long before anything cares how many API actions are registered. You will not recover the 56 kB from the table above by registering zero API actions. Saving on the firmware side helps you alongside Bluetooth, not instead of it.
Recommendation: put the Bluetooth proxy on a separate ESP32. A board costing under four euros plugged into a USB charger has all its memory to itself, and you can flash ready-made firmware through the ESPHome web installer without writing any YAML. You also get to place the proxy where BLE coverage needs it, rather than where your wall switch happens to be. More detail in the Bluetooth Proxy article.
ESP32-WROOM
- WiFi
- Bluetooth
Custom TFT Design
If you enjoy customization, you can create your own display design:
- Download Nextion Editor
- Modify the HMI file according to your preferences
- Compile to TFT
- Upload to the panel
Requires knowledge of the Nextion platform, not for beginners.
Monitoring Display Communication
On the board you'll find test pads labeled TF_RX and TF_TX. With a logic analyzer or a second USB-TTL adapter you can tap into the communication between the ESP32 and the display. This comes in handy when debugging your own TFT design and you need to see what commands the display actually receives.
Troubleshooting
I ran into a few problems during installation that may happen to you as well:
The compile fails with an error
A few error messages you may run into, and what usually sits behind them:
| Message | Cause |
|---|---|
region 'dram0_0_seg' overflowed by N bytes.dram0.bss will not fit in region | You don't fit in memory. Most often because of bluetooth_proxy - see the warning below. Strip components until it passes |
Component not found: nextion_update_url | You put it at the root of the configuration, but it's a substitution - it belongs in the substitutions: block |
Couldn't find ID 'wifi_component' and similar unknown-ID errors | The project package is missing, or you pulled it from a different version. Check the packages: block from Step 2 |
| Errors that appeared "by themselves" after a recompile | You're pulling the package from a moving tag (ref: latest, or ref: main), so the version changed under you. Pin a specific tag as shown in Step 2 |
A file in packages: can't be found (404, Failed to load, an empty package) | The classic when switching to NSPanel Easy: add-ons belong in the esphome/ subfolder, but the base nspanel_esphome.yaml belongs at the root. Check that you have esphome/nspanel_esphome_addon_...yaml with the prefix and nspanel_esphome.yaml without it |
ESPHome version too old / a demand for a higher min_version | NSPanel Easy polices its minimum ESPHome version itself and tells you which one it wants. For v2026.7.1 it's 2026.5.0. Update the ESPHome add-on |
NSPanel Easy has its minimum ESPHome version declared in the firmware and checked at compile time - for v2026.7.1 that's 2026.5.0, and anything older gives you a clear error rather than something cryptic. The project's general rule is that it targets Home Assistant and ESPHome versions released no more than two months before the given NSPanel Easy release.
Nobody polices an upper bound, though, so with an ESPHome much newer than what the firmware was tested against you can end up in a combination nobody has tried - which is exactly what's described here.
The NSPanel won't enter bootloader mode
- Connect
IO0toGNDand only then apply power. Holding the left button doesn't work - the buttons are on GPIO14 and GPIO27, not GPIO0 - Make sure the short is in place throughout power-up, not applied afterwards
- Try a different USB-TTL adapter or a different USB port
The NSPanel reboots every second in a boot loop and the log shows rst:0x1
The code rst:0x1 (POWERON_RESET) means the chip genuinely lost power, not that software crashed. The most common cause is powering the panel from the 3V3 pin on the USB-TTL adapter - move the lead to +5V and run it to the panel's 5V power-header pin, not to 3V3 on the serial header.
The full explanation, including the currents involved and why that log looks trustworthy while being misleading, is in the article on flashing over USB. I walked into this trap myself and it manufactured a false diagnosis - see the post-mortem.
The NSPanel is black, not on Wi-Fi, and reflashing doesn't help
Check the serial log for this:
[C][safe_mode:189]: Unsuccessful boot attempts: 10
[E][safe_mode:201]: Boot loop detected
The panel is stuck in safe mode, where ESPHome starts neither the display nor anything from the panel configuration - a black screen is expected in that state. And it's a trap, because the failed-boot counter lives in flash memory in the NVS partition, which factory.bin never touches. You can reflash the panel as many times as you like and nothing will change.
The fix is to erase the entire flash (esptool erase-flash) and only then write the firmware. The exact commands, the partition table and the explanation of why a factory image can't reach the counter are in the article on flashing over USB. How I found out is covered in the post-mortem.
If your configuration doesn't already have safe_mode: storage: rtc from Step 2, add it. The counter moves to RTC memory, which a power cycle wipes - safe mode stays available as a safety net, but the panel can never latch into it permanently, and unplugging it replaces the whole serial-cable exercise.
The panel takes a long time to join Wi-Fi, or never joins
If you run a hidden SSID, look for these two lines in the log:
[W][wifi:1603]: 'my-iot-network' should be marked hidden
[W][wifi:1480]: No networks found
ESPHome can't find a hidden network by scanning and has to fall back to its hidden-network path. The fix is to skip scanning altogether:
wifi:
  fast_connect: true
The panel then connects straight to the first configured network. For a fixed installation that will talk to the same AP for its whole life, you lose nothing. The link between a hidden SSID and an ESPHome crash is covered in the post-mortem.
hidden: trueESPHome does have a hidden option, but it is only valid inside networks:, not in the top-level wifi:. And with NSPanel Easy you can't set it (nor with NSPanel_HA_Blueprint, where this mechanism comes from) - ESPHome merges lists from packages by concatenation (old + new), so you'd end up with a second network entry with no SSID and the configuration would fail validation. Use fast_connect.
The NSPanel randomly reboots while flashing, or won't connect at all
- The most common cause on the panel is a short against the display's metal shield right next to the serial header - check that no pin touches it and cover it with electrical tape if needed
- Verify that TX and RX are crossed over (panel TX to adapter RX and vice versa)
- The remaining causes are generic to every ESP32 - the cable, the baud rate, a missing common GND. I have a dedicated section on those
The TFT upload won't start, won't finish, or fails even from a local folder
This is the single most common NSPanel problem, and surprisingly few things cause it. One important clue: if it fails even from a local folder, the problem isn't the download - and hunting for a different web server won't help.
Try the blank TFT file first
Most of these problems come down to the Nextion display's Active Reparse Mode. It's enabled on panels that ran the stock Sonoff firmware or nspanel-lovelace-ui, and in that mode the display rejects a normal upload regardless of where the file comes from.
Installing any TFT from this project disables it - but a regular file is over 13 MB, which the ESP32 struggles with. The project therefore ships nspanel_blank.tft, just under 700 kB, whose only purpose is to turn Reparse Mode off. In NSPanel Easy you don't have to download it anywhere - it's an option right in the model selector:
- In the Display model selector, pick NSpanel Blank
- Press Update TFT display and let it finish - it's a small file, so it won't take long
- Only then switch the selector to your real model (NSpanel EU) and upload the proper TFT
Alternatively you can grab nspanel_blank.tft from the hmi/ folder in the repository and host it locally.
If your panel ran nspanel-lovelace-ui, without this intermediate step you won't be able to install anything at all. The project's documentation lists it as a requirement, not a tip.
If that doesn't help, work through this in order
| What to check | Why |
|---|---|
Do you have bluetooth_proxy or esp32_ble_tracker in your config? Remove them temporarily | The TFT upload needs a chunk of RAM and won't get it with BLE. See the memory warning and issue #1815 |
Hosting from /config/www/? Did you restart Home Assistant? | Without a restart that folder isn't served at /local/. This is the most common reason "the local folder doesn't work" |
Are you using http:// rather than https://? | HTTPS is problematic for the ESP and transfers fail on it |
Is there an IP address in the URL instead of homeassistant.local? | DNS and mDNS are a frequent source of trouble. Use http://192.168.x.x:8123/local/…, on new Home Assistant OS installations without :8123 |
| Did you give the panel a manual IP? Add a DNS server | Without DNS it can't download from GitHub. Either add DNS or host locally |
| Did you start the transfer too soon after boot? | The display doesn't connect to ESPHome immediately. Wait up to two minutes for the boot script to finish |
File size - download the .tft with the exact same URL to your computer and compare against GitHub | It's easy to end up saving an HTML page instead of the file. That "uploads" and then fails |
| Disconnect power, wait 30 seconds, power back on | Returns both display and ESP to a clean state |
Are you on the esp-idf framework? | arduino has long been deprecated and unsupported (since v4.3.22 of the original project). NSPanel Easy builds on esp-idf and doesn't support any other framework - switching to arduino is technically still possible, but the docs themselves label it unmaintained. Its transfer engine behaves differently and HTTPS on it tends to be unstable |
Stuck on a repeating [W][nextion:xxx]: Not connected? | The firmware is probing for the display's baud rate, which takes a while on the first boot. If it never gets past that, add the include_button_scan_baud_rate: true substitution - you'll get a Scan baud rate diagnostic button in Home Assistant that walks through every supported rate and then starts the transfer at the one that works |
Once a transfer has started, the panel often ignores the Restart button in Home Assistant and the fifteen-second button hold. Disconnecting power helps, as does the hardware reset button in the small hole on the back of the panel - reachable with a pin.
It looks alarming, sometimes even upside-down, but it only means the TFT file is incomplete or invalid. A successful upload fixes it; the panel isn't damaged. For "Model does not match", a reboot is sometimes enough to restore the previous TFT.
That's a different problem - the panel isn't running the NSPanel Easy configuration. See its own section. If you do have the configuration and the controls are still missing, remove the ESPHome integration, restart Home Assistant and add the device again.
The NSPanel didn't show up in Home Assistant after flashing
- Check that the ESPHome integration is active
- Restart Home Assistant
- Try adding it manually via IP address and port
6053
The NSPanel shows a white display and nothing appears
- During the TFT upload this is normal, just be patient
- If it takes longer than 20 minutes, try restarting the panel
Evaluation
After several months of using NSPanel with ESPHome, I can say I'm very satisfied. Installation does require some technical knowledge and patience, but the result is worth it.
✅ Main Advantages
- Complete control - no cloud dependency
- Deep integration - everything from Home Assistant at your fingertips
- Active community - regular updates and support
- Great price/performance ratio - an amazing solution for well under €70
- No cloud - keeps working even if the eWeLink servers disappear
⚠️ What Could Be Better
- Display quality - average viewing angles, slightly faded colors
- More complex installation - not for complete beginners
- TFT upload - sometimes it's a bit of a lottery
Recommendation
I recommend NSPanel with ESPHome if you:
- ✅ Use Home Assistant
- ✅ Have basic technical knowledge
- ✅ Don't want cloud solutions
- ✅ Appreciate good value for money
I don't recommend if you:
- ❌ Are a complete beginner
- ❌ Want a plug-and-play solution
- ❌ Require a premium display
If you're looking for an intelligent control panel with a good price-to-performance ratio and don't want to be dependent on the cloud, NSPanel with ESPHome is an excellent choice. Installation isn't trivial, but thanks to this guide, anyone with some technical knowledge should be able to handle it.
Sonoff NSPanel EU, Gray
- WiFi
- Bluetooth
Sonoff NSPanel EU, White
- WiFi
- Bluetooth
CP2102 USB 2.0 to TTL UART Module
- USB
Related Articles
- From NSPanel_HA_Blueprint to NSPanel Easy - migration step by step
- When the NSPanel won't boot after an update - anatomy of one outage
- ESPHome - Introduction and Installation
- Flashing ESPHome firmware over USB - first install, esptool and device rescue
- Bluetooth Proxy in Home Assistant
- Tasmota - Alternative to ESPHome
Sources
- NSPanel Easy documentation - the project's official docs, including the language list and the guide for migrating from the original project
- NSPanel Easy on GitHub - source code, releases and issue reporting
- NSPanel Easy community Discord - the fastest place to get questions and problems answered
- Issue #3277 - Transitioning Development to NSPanel Easy - the announcement that development moved out of the original repository
- NSPanel teardown on blakadder.com - detailed hardware breakdown including board photos and the complete pinout
Did this guide help you?
I write these guides in my spare time and keep them up to date. If one saved you time, you can chip in.
One-off, by card or Apple Pay. You can change the amount on the next page.
Would rather not send money? Buy the parts through my product links. The price is the same for you and it helps too.