Bluetooth Proxy (ESPHome)
The Bluetooth Proxy integration is not a traditional type of integration that adds specific products or services. Instead, it allows Home Assistant to recognize Bluetooth devices that are out of range of the hardware on which Home Assistant is running.
Bluetooth Proxy Support in Home Assistant
Home Assistant has gradually introduced support for Bluetooth, expanding its integration capabilities:
- Home Assistant 2022.08 - introduced support for internal Bluetooth and USB dongles
- Home Assistant 2022.09 - enabled passive data reading from ESP32 devices using ESPHome Proxy
- Home Assistant 2022.10 - added the ability to actively control devices through an active Bluetooth proxy
- ESPHome 2022.11 - introduced
bluetooth_proxycomponent - ESPHome 2023.6 - added Advertisement Bundling feature for improved performance
Role of Bluetooth Proxy
A Bluetooth proxy is useful in situations where:
- Home Assistant is not close enough to the Bluetooth device.
- We want to extend Bluetooth coverage throughout the house.
ESPHome acts as a bridge between Bluetooth and WiFi/Ethernet, allowing connection to remote devices.
Recommended Hardware
I have had great success with basic ESP32 devices, which can be purchased for a very low cost. They include both WiFi (2.4GHz only) and Bluetooth and are directly supported by ESPHome for Proxy.
Basic ESP32 Modules
The simplest and cheapest solution for Bluetooth Proxy:


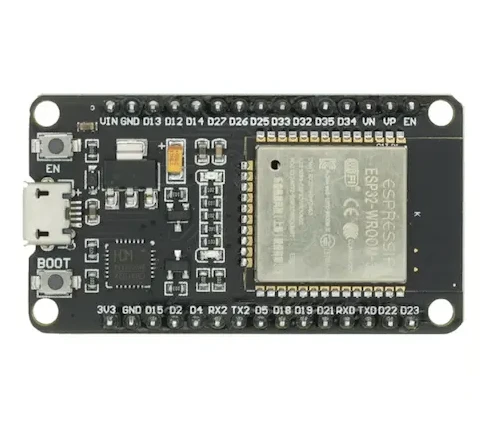
ESP32-WROOM
Basic ESP32 in many variantsSmart Control Panels with Bluetooth Proxy
If you're looking for a more comprehensive solution that combines a control panel with Bluetooth Proxy functionality, you can check out the Sonoff NSPanel. This device contains an ESP32 chip and, after uploading the ESPHome firmware, not only functions as a touch panel for controlling your smart home but also serves as a Bluetooth Proxy to extend coverage for BLE devices.
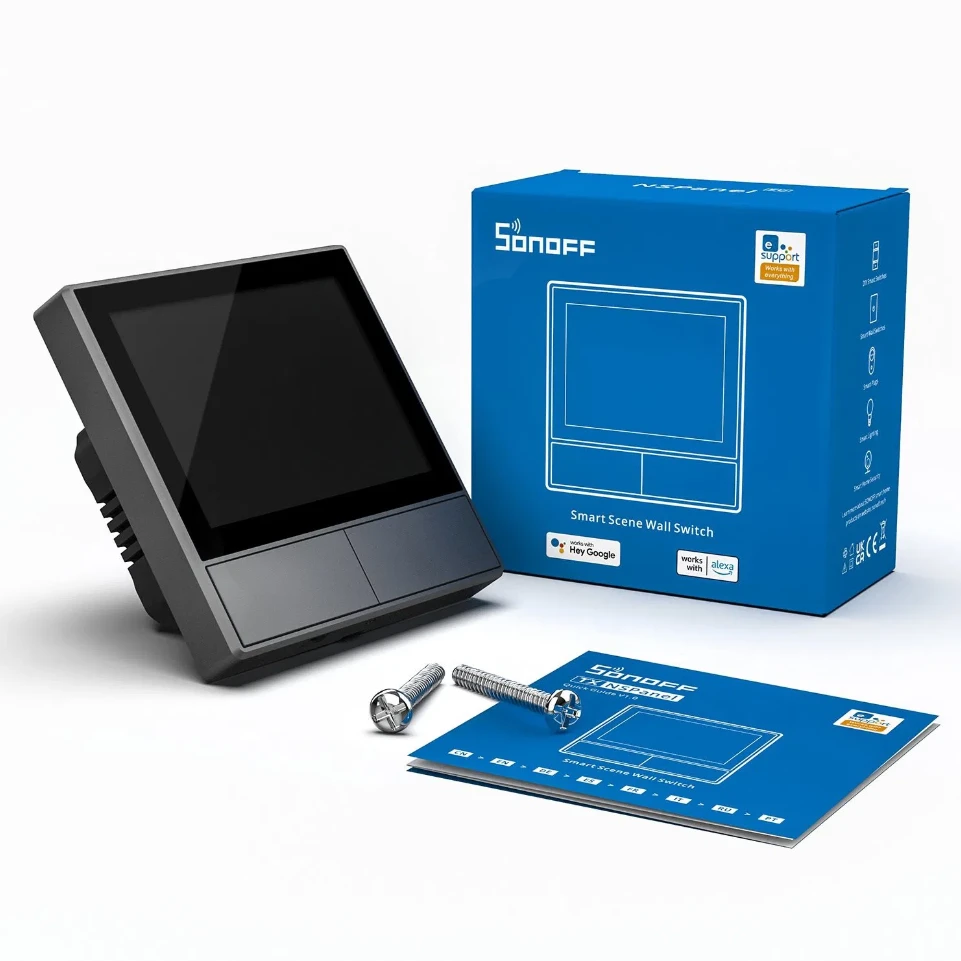
Sonoff NSPanel EU, Gray
Smart control panel with integrated touchscreen display.
Sonoff NSPanel EU, White
Smart control panel with integrated touchscreen display.For more information about NSPanel and its configuration, see my article Sonoff NSPanel - eWelink or ESPHome.
Creating a Bluetooth Proxy Using ESP32 and ESPHome
The procedure differs depending on the current situation:
- If we are already running ESPHome on some ESP32 compatible device.
- If we do not yet have ESPHome installed or want to set up ESPHome on another device.
Adding to an Existing ESP32 with ESPHome
We will assume that we already have the ESPHome add-on installed in Home Assistant and can edit the configuration of the ESP32 device.
The situation will be simple, as we only need to add two lines:
# Example configuration to activate Bluetooth Proxy
bluetooth_proxy:
  active: true
and upload the updated version to the ESP32.
Since ESPHome 2024.11, the active parameter defaults to true, so you can omit it if you want an active proxy. Previously, the default was false (passive only).
The first line adds support for Bluetooth Proxy, and the second line specifies whether we want only a passive or active version.
Creating a New ESP32 Device with ESPHome
When using a new ESP32 device, it is not even necessary to have the ESPHome Addon installed in Home Assistant, and everything can be done through the web interface.
Simply connect the ESP32 device to the computer via USB, open the web interface in the Chrome browser, and after successfully uploading the firmware to the ESP32, Home Assistant will automatically find and install it as an integration when connected to the correct WiFi network.
ESPHome also has a dedicated Bluetooth Proxy installer that offers pre-configured setups for various ESP32 devices.
Advanced Configuration and Optimization
Advertisement Bundling (ESPHome 2023.6.0+)
Advertisement Bundling is a feature that significantly improves Bluetooth Proxy performance by grouping multiple BLE advertisements into a single network packet. This reduces network overhead and improves reliability.
bluetooth_proxy:
  active: true
  # Advertisement bundling is enabled by default since ESPHome 2023.6.0
Benefits:
- Reduced network traffic - up to 10x fewer packets
- Lower latency - faster device response
- Better reliability - fewer packet losses
- Lower CPU usage on both ESP32 and Home Assistant
Advertisement Bundling is enabled by default in ESPHome 2023.6.0+. No additional configuration is needed!
Configuring Connection Count
Bluetooth Proxy in ESPHome allows up to 9 simultaneous active BLE connections (max value). The default depends on your configuration:
bluetooth_proxy:
  active: true
  connection_slots: 3  # Default for most configurations, max 9
  cache_services: auto  # Cache discovered services (default: auto)
Connection Slots Guidelines:
- Default: 3 connections (sufficient for most setups)
- Maximum: 9 connections
- Each connection slot consumes approximately 1KB of RAM
Cache Services Option:
auto(default) - automatically determines optimal caching strategytrue- always cache service information (faster reconnection, uses more memory)false- never cache (saves memory, slower reconnection)
Increasing connection slots beyond 3-5 may lead to instability on devices with limited memory. Test thoroughly if you increase this value.
Framework: ESP-IDF vs Arduino
For optimal Bluetooth Proxy performance, I strongly recommend using the ESP-IDF framework instead of Arduino:
esp32:
  board: esp32dev
  framework:
    type: esp-idf  # Significantly better performance than Arduino
Reasons for ESP-IDF:
- Lower memory consumption
- Better Bluetooth performance
- More stable operation
When switching from arduino to esp-idf, you must upload the firmware via USB cable because the partition table changes. OTA updates will not work in this case!
Optimizing Signal Reception
For maximum Bluetooth signal reception performance:
1. Device Placement:
- Place the ESP32 as close as possible to the BLE devices you want to monitor
- At least 3 meters away from routers, switches, and network equipment (EMI interference)
- Avoid placement in metal racks
2. WiFi vs Ethernet:
- Ethernet connection significantly improves Bluetooth performance by freeing up the WiFi module
- For WiFi devices, do not change scan parameters from default values (may cause WiFi instability)
3. Scan Parameters (Ethernet devices only):
esp32_ble_tracker:
  scan_parameters:
    interval: 1100ms
    window: 1100ms
    active: true
This setting maximizes the chance of catching all BLE broadcasts, but use only on devices with Ethernet connection!
Disabling Web Server
If you're using Bluetooth Proxy, disable the Web Server component as it may cause memory issues:
# Do NOT use web server with Bluetooth Proxy
# web_server:  # <- comment out or remove
Adding Bluetooth Devices to Home Assistant via ESPHome Proxy
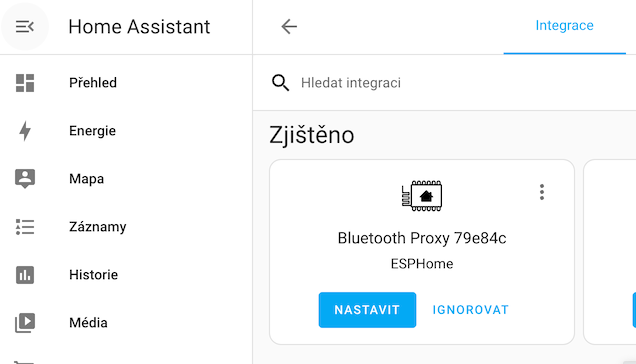
If we already have an ESP32 with ESPHome Proxy running and have added it to Home Assistant, devices with the discovered flag should start appearing after a while.

Bluetooth Network Visualization
Home Assistant includes a useful Bluetooth network visualization feature that allows you to view the entire Bluetooth network topology, including which devices are discovered by which scanners.
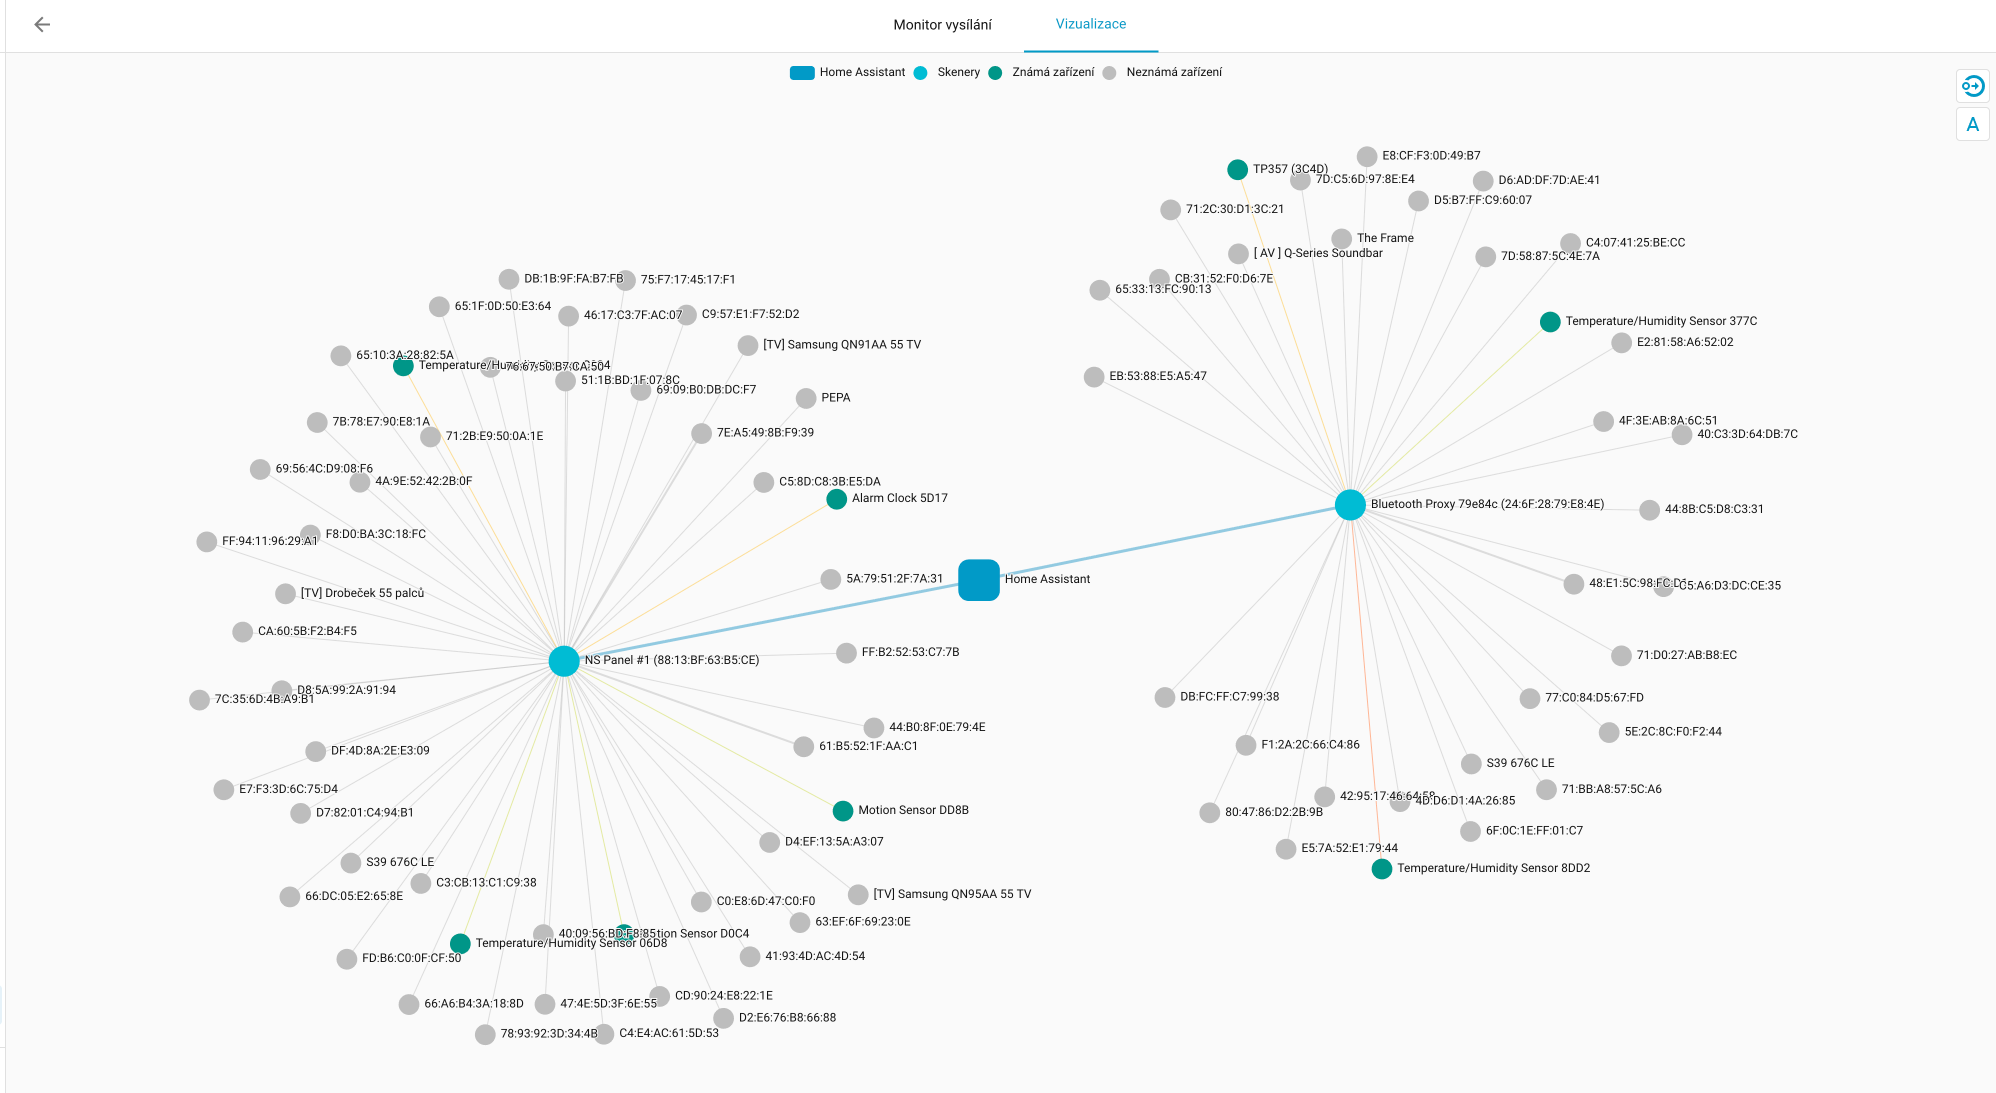
The visualization clearly shows:
- Bluetooth scanners (proxies) - in the example, you can see two scanners:
- Simple ESP32 board - a basic device dedicated solely to Bluetooth Proxy
- Sonoff NSPanel - a smart control panel with ESPHome that also functions as a Bluetooth Proxy (more details in my article Sonoff NSPanel - eWelink or ESPHome)
- Discovered devices connected to individual scanners
- Known devices - Bluetooth devices already integrated and used in Home Assistant
- Unknown devices - discovered devices that have not yet been added to Home Assistant
To view the Bluetooth network visualization in Home Assistant:
- Go to Settings → Devices & Services
- Click on the Integrations tab
- Find any Bluetooth device
- Click on the settings gear icon next to the device
- In the Broadcast Monitoring section, click Visualization
This visualization is particularly useful when:
- You want to verify that your Bluetooth Proxies are working correctly
- You need to determine which scanner has the best signal to a specific device
- You're planning the placement of additional scanners to extend coverage
- You want to identify unknown devices in range that might be worth adding
Four letters/numbers in the device name correspond to the last four characters of the device's MAC address.
If the device does not appear as discovered for some reason, it is still possible to add it using the Add Integration button, where we manually search for the integration. For example, for Bluetooth devices from Xiaomi, we can use the integration named Xiaomi BLE.
The specific steps during the addition may vary depending on the manufacturer and device, but it should not usually be complicated.
We will look at Xiaomi devices, which are among the most widespread – at least for me – and specifically show two scenarios:
- Adding a device without a pairing code
- Adding a device with a pairing code
Device Without a Pairing Code
These are usually older devices that do not yet use data encryption, making their addition simpler. On the other hand, anyone within range can add them.
An example of such a device is the Xiaomi Mijia LYWSDCGQ thermometer, which, however, seems to be almost impossible to find nowadays.
After adding it to Home Assistant, we can see both the Temperature and Humidity as well as the status of the AA battery.
Device with a Pairing Code – Xiaomi
Newer Xiaomi devices, on the other hand, require a token for pairing – in the official Xiaomi Home app, you are spared this, but internally this token is generated and used.
As in the previous case, the device will first appear in the Discovered state, and if you do not yet know the pairing token, I recommend not adding it yet – we will look at how to obtain it below.
An example of such a device is the Xiaomi Mijia LYWSD03MMC thermometer.
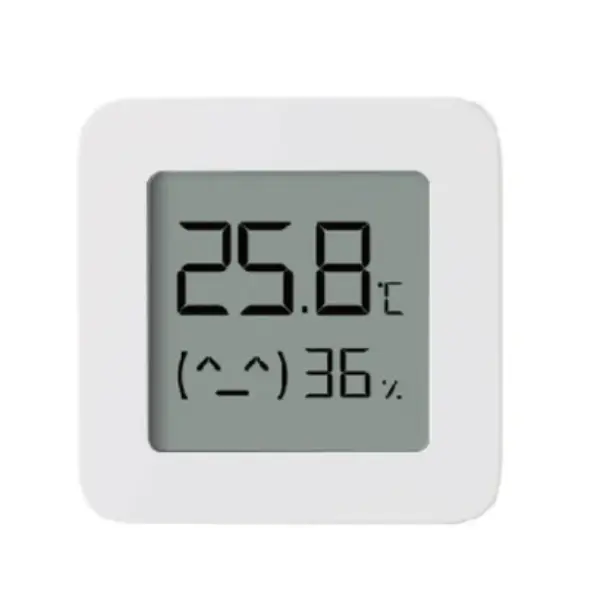
Xiaomi Mijia Bluetooth Thermometer
Bluetooth thermometer and hygrometer from Xiaomi LYWSD03MMCObtaining the Existing Pairing Code
There are two methods to obtain the pairing code for Xiaomi devices:
Method 1: Token Extractor Application (Recommended)
The first option is to obtain the existing pairing code stored on the Xiaomi Cloud. Download the Token Extractor application from the web and prepare the login credentials for Xiaomi Cloud (same as used in the Xiaomi Home app).
The installation is ideally done from the command line:
wget https://github.com/PiotrMachowski/Xiaomi-cloud-tokens-extractor/releases/latest/download/token_extractor.zip
unzip token_extractor.zip
cd token_extractor
and we will also need to install the Python packages. I recommend doing this in a separate Python Environment, which you can then delete:
python3.11 -m venv venv
source ./venv/bin/activate
pip install -r ./requirements.txt
We run the application with the command python token_extractor.py, and after entering the login details, we will also need to enter the server. This should correspond to the region setting in the Xiaomi Home app – in our region, we will probably have it set to Czechia, and then the server name is de (i.e., Germany).
The login to the Xiaomi cloud will take place, and we should get a list of all devices, including pairing codes – here they are labeled as tokens.
Server (one of: cn, de, us, ru, tw, sg, in, i2) Leave empty to check all available:
de

Logging in...
Logged in.

Devices found for server "de":

---------

   ---------
   NAME:     Thermometer #1
   ID:       blt.4.1b8ih56mcgc00
   BLE KEY:  758679a38a4d356bc7aa926f40af2434
   MAC:      A4:C1:38:91:A4:DE
   IP:       45.129.32.131
   TOKEN:    07c5d233c078fb0b7d0be498
   MODEL:    miaomiaoce.sensor_ht.t2
   ---------
   NAME:     Thermometer #2
   ID:       blt.4.1ghihju9cgk00
   BLE KEY:  2bab4851cc3adb58a87dcaca374d5dba
   MAC:      A4:C1:38:92:2A:45
   TOKEN:    82ae1f02e05a3f4dbf6509ee
   MODEL:    miaomiaoce.sensor_ht.t2
   ---------
...

Press ENTER to finish
According to my findings, it seems that the Xiaomi Mijia LYWSDCGQ thermometer can no longer be used via ESPHome Proxy in the case of firmware 2.x. If you haven't done so yet, do not perform the update through the app.
You can probably tell if you have version 2 during the pairing code retrieval, where version 2 also includes an IP address.

Method 2: Using Home Assistant (Easier!)
Since Home Assistant 2023.8, you can retrieve Xiaomi Cloud credentials directly from Home Assistant without external tools:
- Go to Settings → Devices & Services
- Click Add Integration
- Search for and select Xiaomi Miio
- Select Connect to Xiaomi Cloud
- Enter your Xiaomi account credentials
- Home Assistant will automatically retrieve all binding keys for your Xiaomi BLE devices
This method is much simpler and doesn't require installing Python packages or running command-line tools!
Method 2 (Home Assistant integration) is now the recommended approach for most users.
Generating a New Pairing Code
If we do not want to use the application to obtain the code for any reason, the second option, which is not general, is to use the website to generate a new code in the case of the Xiaomi thermometer. This is done by connecting via Do Activation and then copying the Mi Bind Key.
The disadvantage of this solution is that the device's token will be changed, i.e., we will no longer be able to connect to the device via the Xiaomi Home app – the tokens will not match.
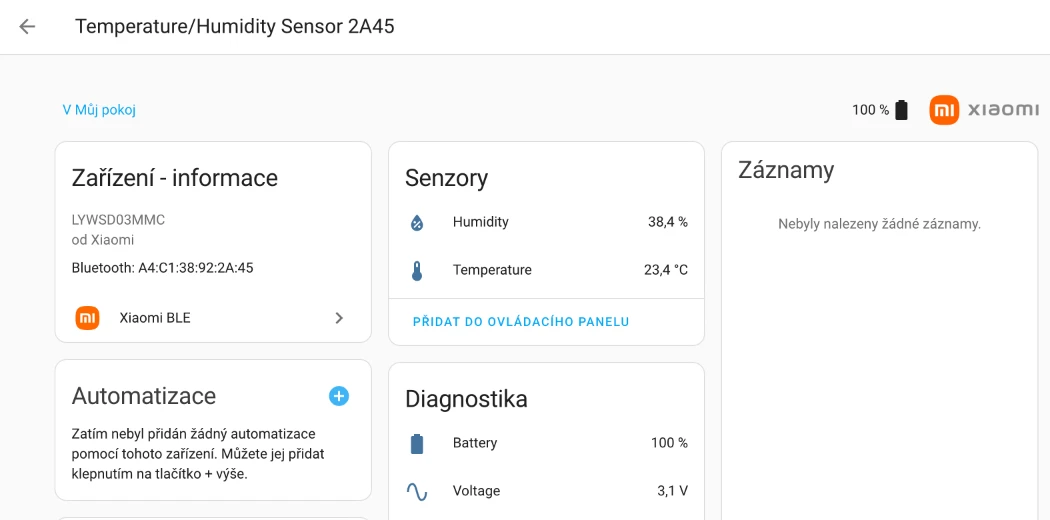
Adding the Device to Home Assistant
Now we can click the Set Up button to add it. If we now look at the new device, we will find that it does not contain any entities. This is because the transmission of values is encrypted, and we still need to set the pairing code.
We wait a little longer, and the device should reappear at the top of the device list in the Attention Required state.

If we now click on Reconfigure, we will receive a dialog where we can enter the pairing key we obtained using one of the methods above.

With that, we are done, and the entities will gradually start to appear.
Device with a Pairing Code – QINGPING
Apparently, not all integrations require knowing the pairing code, so, for example, the QINGPING alarm clock, which appears as a Xiaomi device, can be added in Home Assistant via the QINGPING integration, which does not require entering the pairing code.
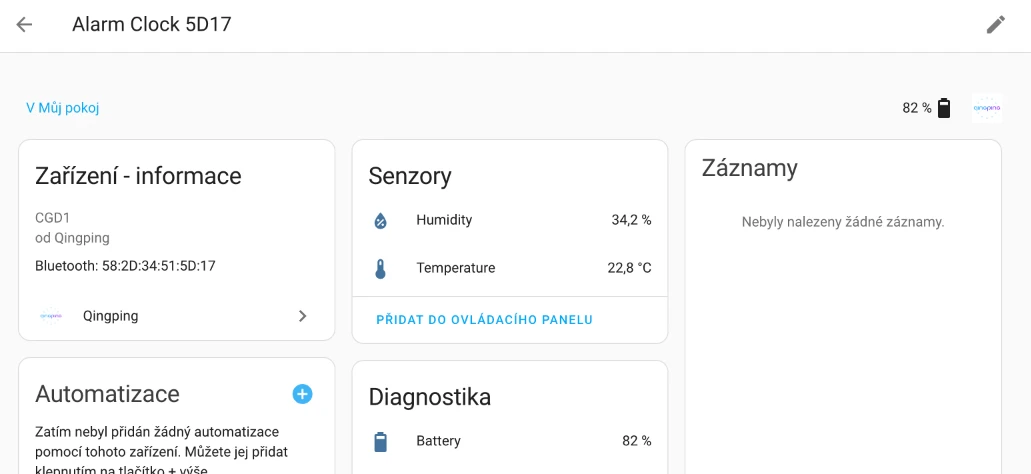
However, we can still add QINGPING devices using the Xiaomi BLE integration, which will require the pairing code.
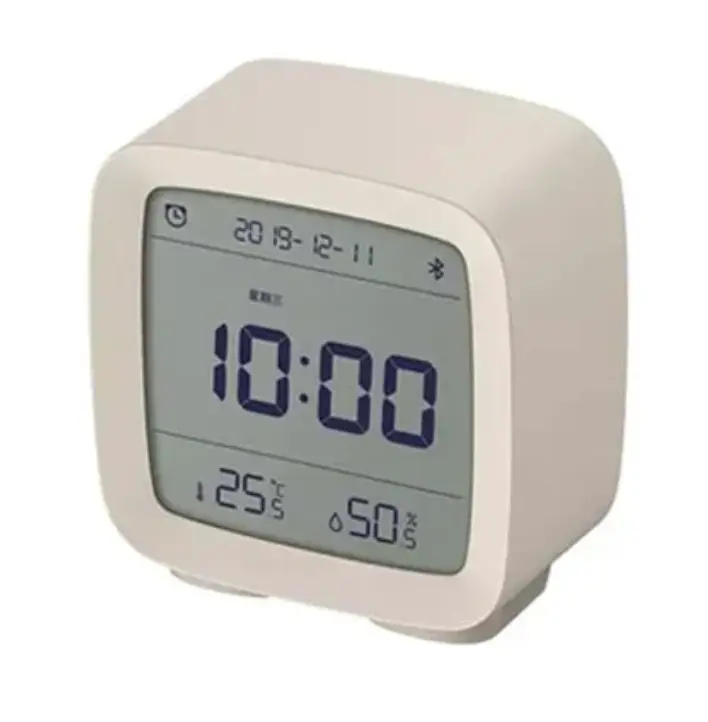
Qingping Bluetooth Alarm Clock
Bluetooth alarm clock with thermometer and hygrometerEvaluation
I have been using Xiaomi Bluetooth thermometers for quite some time because they are very inexpensive and have a display. However, before the proper Bluetooth support was added directly to Home Assistant, I integrated them using ESP32 and ESPHome, where I set up individual devices directly in ESPHome.
The new method using the ESPHome Proxy integration greatly simplifies the integration of Bluetooth devices and may make it a bit more complicated to decide which device to choose – whether WiFi, Zigbee, or now Bluetooth.
Especially for sensors, the differences and comparison of advantages/disadvantages between Zigbee and Bluetooth can be very close, making the decision more difficult. The advantage of Bluetooth should generally be longer battery life and usually lower cost. The disadvantage is the need to spread the Bluetooth signal throughout the house if we do not want to cover only one room.