Remote Access to Home Assistant
Remote access to Home Assistant allows you to control your smart home from anywhere in the world. Whether you're at work, on vacation, or just out for a walk, you can monitor and control all your smart devices. In this article, we'll explore three main methods for setting up secure remote access.

Comparison of Remote Access Methods
There are three main ways to make Home Assistant accessible from the internet. Each method has its advantages and disadvantages that are worth considering before making a choice:
| Method | User-Friendliness | Cost | Own Domain Required | Supports HA Development | Configuration Complexity | Security |
|---|---|---|---|---|---|---|
| Home Assistant Cloud | Very High | $6.50 / month | ❌ | ✅ | Very Low | Very High |
| Cloudflare Tunnel | High | Free | ✅ | ❌ | Medium | High |
| Public IP and Ports | Low | Free | ✅ (recommended) | ❌ | High | Variable |
Which Method to Choose?
Home Assistant Cloud is ideal if you:
- ✅ Want the simplest solution without technical knowledge
- ✅ Want to support Home Assistant development
- ✅ Need a reliable service with support
- ✅ Don't want to deal with domains and certificates
- ✅ Appreciate additional features (Alexa/Google Assistant integration)
Cloudflare Tunnel is suitable if you:
- ✅ Have basic technical knowledge
- ✅ Want a free solution
- ✅ Have or are willing to get your own domain
- ✅ Want more control over configuration
- ✅ Don't want to open ports on your router
Public IP and Ports consider if you:
- ✅ Have advanced technical knowledge
- ✅ Want maximum control over everything
- ✅ Have a static IP or DDNS service
- ✅ Understand network security and SSL certificates
- ✅ Want to avoid dependency on third parties
Not recommended if you:
- ❌ Don't have experience with network security
- ❌ Don't want to deal with updates and maintenance
- ❌ Don't have time to solve potential problems
- ❌ Your ISP blocks incoming connections
1. Home Assistant Cloud (Nabu Casa)
Home Assistant Cloud is the official cloud service from the creators of Home Assistant. It's the simplest and most secure way for remote access, which also directly supports the project's development.
What Do You Get for $6.50/month?
- 🌐 Remote access without needing to open ports or set up a domain
- 🔒 Automatic SSL certificates and encrypted connection
- 🗣️ Voice assistant integration (Amazon Alexa, Google Assistant)
- ☁️ Cloud backups of configuration
- 💚 Support for Home Assistant development
I've configured Home Assistant Cloud for several clients and must say it's the simplest solution for those who want everything working without worries. Setup takes literally 2 minutes and works reliably. For $6.50 per month, it's definitely worth it, especially when you're supporting Home Assistant development.
Installation and Setup
-
Go to Settings
- In Home Assistant, open Settings → Home Assistant Cloud
-
Create an Account
- Click Create Account
- Fill in email and password
- Confirm registration via email
-
Log In
- After email confirmation, log in to Home Assistant Cloud
- Choose a subscription (monthly or annual)
-
Activate Remote Access
- After logging in, remote access is automatically activated
- Your URL will be in the format:
https://xxxxx.ui.nabu.casa
-
Test Connection
- Try logging in from mobile internet (turn off WiFi)
- You should be able to access Home Assistant without problems
Additional Features
Voice Assistant Integration
After activating Home Assistant Cloud, you can easily connect Home Assistant with Amazon Alexa or Google Assistant:
- In Home Assistant Cloud settings, go to Amazon Alexa or Google Assistant
- Click Enable and follow the instructions
- In the Alexa/Google Home app, add the "Home Assistant Cloud" skill
- Now you can control devices with voice
Detailed instructions for setting up voice assistants can be found in the official Home Assistant Cloud documentation.
Troubleshooting
Cannot connect via remote URL
- Check that you have an active subscription
- Verify that Home Assistant Cloud is logged in (green dot in settings)
- Try restarting Home Assistant
Voice assistant doesn't see devices
- Check that you have devices exposed for Alexa/Google Assistant
- In device settings, enable "Expose to voice assistants"
- Perform "Discover devices" in the voice assistant app
2. Cloudflare Tunnel
Cloudflare Tunnel is a free service that creates a secure tunnel between your Home Assistant and the Cloudflare network. You don't need to open any ports on your router and you get automatic SSL certificates.
Prerequisites
Before starting, you'll need:
- ✅ Your own domain (e.g.,
your-domain.com) - ✅ Free Cloudflare account
- ✅ Domain managed through Cloudflare DNS
Cloudflare Tunnel is completely free including support for subdomains (e.g., ha.your-domain.com). The paid Zero Trust version ($10/month) is only needed for advanced enterprise features like Access Policies, which you don't need for regular use.
Step 1: Prepare Cloudflare Account
If you don't have a Cloudflare account yet:
- Go to cloudflare.com and register
- Add your domain to Cloudflare
- Change DNS servers at your domain registrar to Cloudflare servers
- Wait for activation (usually within 24 hours)
Step 2: Install Cloudflare Tunnel Addon
-
In Home Assistant, go to Settings → Add-ons → Add-on Store
-
Click ⋮ (three dots) in the top right corner and select Repositories
-
Add repository:
https://github.com/brenner-tobias/ha-addons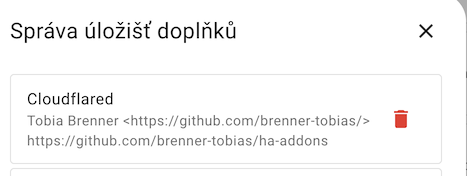
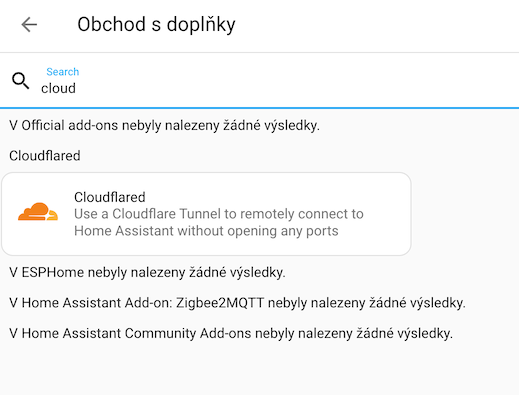
-
Find Cloudflare Tunnel in the store and click Install
Step 3: Configure Addon
-
After installation, open addon Configuration
-
Fill in External Home Assistant Hostname:
ha.your-domain.com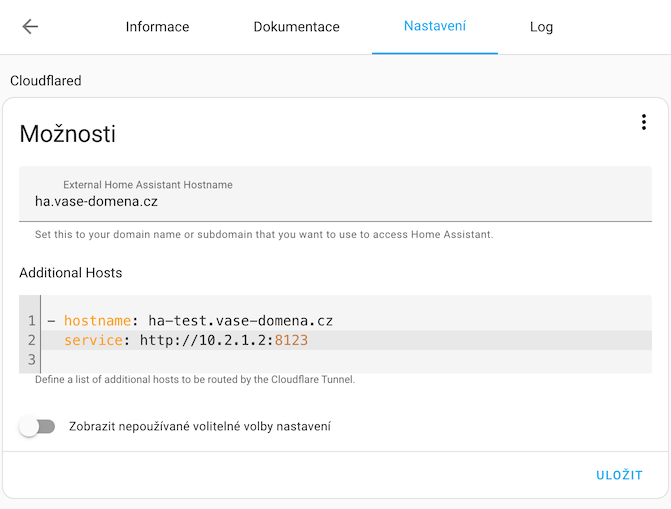
-
(Optional) If you want to expose other services (e.g., Node-RED, Grafana), add them to Additional Hosts:
- hostname: nodered.your-domain.com
  service: http://192.168.1.100:1880
- hostname: grafana.your-domain.com
service: http://192.168.1.100:3000 -
Save configuration and start addon
Step 4: Authorize in Cloudflare
-
After starting the addon, open Log
-
Find the authorization URL (starts with
https://dash.cloudflare.com/argotunnel...) -
Open the URL in browser and log in to Cloudflare
-
Select the domain you want to connect the tunnel to
-
Authorize the connection
-
In the log you should see:
Created tunnel homeassistant with id xxxxx
[INFO] Creating DNS entry ha.your-domain.com...
[INFO] Finished setting up the Cloudflare Tunnel
Step 5: Configure Home Assistant
For Home Assistant to work properly behind Cloudflare proxy, you need to edit configuration.yaml:
-
Open
configuration.yaml(via File Editor addon or SSH) -
Add or edit the
httpsection:configuration.yamlhttp:
use_x_forwarded_for: true
trusted_proxies:
- 172.30.33.0/24 -
Save the file and restart Home Assistant
The IP address 172.30.33.0/24 is the internal Docker container network in Home Assistant OS. If you're using a different installation (e.g., Docker, Core), the IP address may be different. Check the addon IP in Settings → Add-ons → Cloudflare Tunnel → Info.
Step 6: Testing
- Open browser and go to
https://ha.your-domain.com - You should see the Home Assistant login screen
- Try logging in from mobile internet (turn off WiFi)
If you can't connect, check:
- ✅ Addon is running (green dot)
- ✅ No error in log
- ✅ DNS record exists in Cloudflare (type CNAME)
- ✅
trusted_proxiesis correctly set - ✅ Home Assistant was restarted after configuration change
Advanced Settings
Multiple Home Assistant Instances
If you have test and production environments, you can expose both through one tunnel:
external_hostname: ha.your-domain.com
additional_hosts:
  - hostname: ha-test.your-domain.com
    service: http://192.168.1.101:8123
Custom Tunnel Name
By default, the tunnel is named homeassistant. You can change this:
tunnel_name: my-ha-tunnel
Troubleshooting
Error "Invalid client IP"
- Problem with
trusted_proxiesconfiguration - Check the IP address of Cloudflare Tunnel addon
- Make sure you restarted Home Assistant
Tunnel keeps restarting
- Check addon log
- There might be an authorization problem - try reinstalling addon
- Verify that domain is correctly set up in Cloudflare
DNS record not created
- Check that you have the domain in Cloudflare
- Verify that you correctly authorized the tunnel
- Try creating DNS record manually (type CNAME, target:
xxxxx.cfargotunnel.com)
3. Public IP Address and Port Forwarding
This method is the most complex and requires advanced knowledge of networks and security. I don't recommend it for beginners - if you don't know exactly what you're doing, you could expose your network to security risks.
Prerequisites
- ✅ Public IP address (static or dynamic with DDNS)
- ✅ Ability to open ports on router (port forwarding)
- ✅ Own domain (recommended)
- ✅ Advanced knowledge of networks and security
- ✅ Ability to set up SSL certificates
Opening ports on your router means you're exposing Home Assistant directly to the internet. If you don't have properly configured security (strong passwords, SSL certificates, fail2ban, etc.), this can lead to unauthorized access to your network!
What You'll Need
-
Static IP or DDNS Service
- If you don't have a static IP, use a DDNS service (e.g., DuckDNS, No-IP)
- DDNS automatically updates DNS record when IP changes
-
SSL Certificate
- Never use HTTP without encryption!
- You can use Let's Encrypt (free)
- Or Cloudflare Origin Certificate
-
Reverse Proxy (recommended)
- Nginx Proxy Manager
- Traefik
- Caddy
Basic Procedure (Simplified)
This procedure is very simplified and serves only as a guide. For production use, I recommend thoroughly studying security best practices!
1. Set Up DDNS (if you don't have static IP)
We'll use DuckDNS as an example:
- Register at duckdns.org
- Create a subdomain (e.g.,
my-ha.duckdns.org) - In Home Assistant, install DuckDNS addon
- Configure addon with your token and domain
2. Obtain SSL Certificate
We'll use Let's Encrypt addon:
- Install Let's Encrypt addon
- Configure with your domain
- Addon automatically obtains and renews certificates
3. Configure Home Assistant
Edit configuration.yaml:
http:
  ssl_certificate: /ssl/fullchain.pem
  ssl_key: /ssl/privkey.pem
  server_port: 8123
4. Port Forwarding on Router
-
Log in to router administration
-
Find Port Forwarding or Virtual Server section
-
Add rule:
- External port: 443 (HTTPS)
- Internal IP: Home Assistant IP address
- Internal port: 8123
- Protocol: TCP
-
Save and restart router
5. Testing
- From mobile internet (turn off WiFi) go to
https://my-ha.duckdns.org - You should see the Home Assistant login screen
Recommended Security Measures
If you're already using this method, at minimum implement:
- Strong passwords - use password manager and unique passwords
- Fail2ban - automatically blocks IPs after failed login attempts
- Regular updates - keep Home Assistant and addons up to date
- Firewall - allow only necessary ports
- Monitoring - watch logs and unusual activity
- Backups - regularly backup configuration
If you're considering this method because of cost, consider Cloudflare Tunnel instead, which is free and much more secure. If you want to support Home Assistant, choose Home Assistant Cloud. I only recommend the public IP method if you have specific requirements or want to experiment and learn.
Comparison in Practice
To help you decide, here's my personal experience with all three methods:
Cloudflare Tunnel ⭐⭐⭐⭐⭐
I use daily
- ✅ Free
- ✅ Reliable and fast
- ✅ No availability issues
- ✅ Works everywhere
- ✅ Automatic SSL certificates
- ⚠️ Need own domain (~$10/year)
- ⚠️ More complex initial setup than Cloud
Home Assistant Cloud ⭐⭐⭐⭐⭐
I configured for clients
- ✅ Setup in 2 minutes
- ✅ Never any problems
- ✅ Fast connection
- ✅ Works everywhere (even on corporate WiFi with restrictions)
- ✅ Bonus: Alexa/Google Assistant integration
- ⚠️ Cost: $6.50/month (but worth it)
Public IP ⭐⭐⭐
I tried it, but don't recommend
- ✅ Maximum control
- ✅ Good learning experience
- ❌ Time-consuming maintenance
- ❌ Security stress
- ❌ Problems with DDNS updates
- ❌ Doesn't work on some networks (CGNAT)
Frequently Asked Questions
Can I use multiple methods simultaneously?
Yes, you can have for example Home Assistant Cloud for regular use and Cloudflare Tunnel as backup. Just be careful with proper trusted_proxies configuration.
Is it safe to use remote access?
Yes, if you use Home Assistant Cloud or Cloudflare Tunnel. Both methods use encrypted connection and you don't open ports on your router. With the public IP method, it depends on your configuration.
Does remote access work on the mobile app?
Yes, the Home Assistant mobile app automatically detects whether you're home (local network) or away (remote access) and uses the correct address.
Can I share access with family?
Yes, in Home Assistant you can create multiple user accounts with different permissions. Each family member can have their own login.
What if my home internet goes down?
If your internet goes down, you won't be able to connect remotely (logically). But local control on the home network will work normally.
Related Articles
- Hardware for Home Assistant - choosing the right hardware for installation
- Terminal & SSH - advanced Home Assistant management via command line
- HACS - extending Home Assistant with community integrations
Conclusion
Remote access to Home Assistant is easier than ever today. If you want the simplest solution and don't mind paying $6.50 per month, choose Home Assistant Cloud. If you have basic technical knowledge and want a free solution, Cloudflare Tunnel is a great choice. I only recommend the public IP method for advanced users who want to experiment.
I personally use Cloudflare Tunnel and am very satisfied with it. It works reliably, is free, and I have full control over the configuration. For clients who want the simplest solution, I set up Home Assistant Cloud because it's truly "plug and play" without any worries. 💚